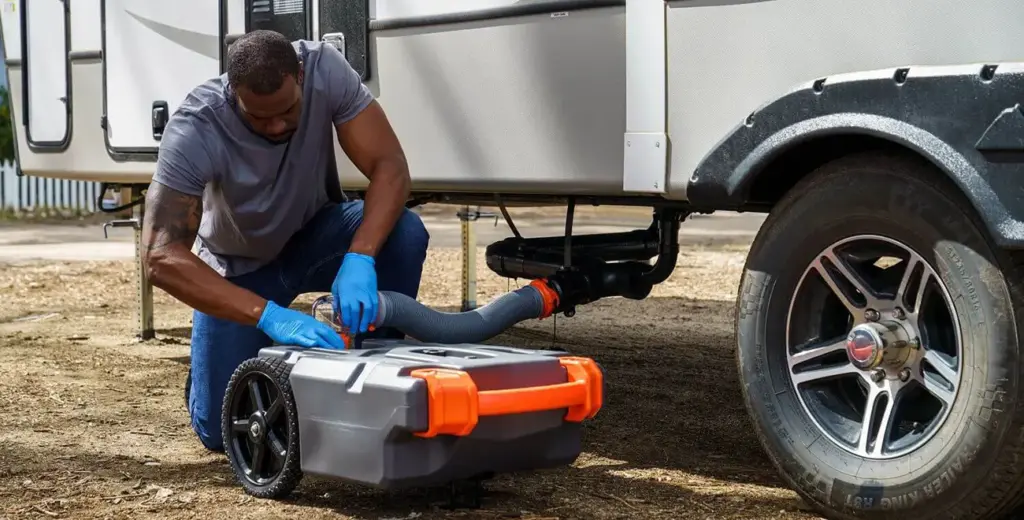
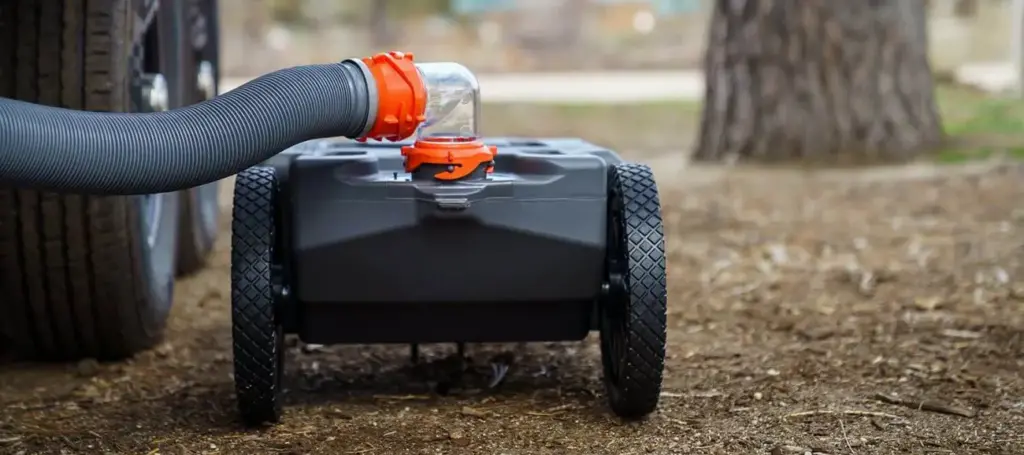
Emptying and Cleaning Your Tanks You’re out on the open road, wind in your hair, and the world as your backyard. But wait, what’s that smell? Oh no, it’s the dreaded holding tank odor! Fear not, fellow RV adventurer. Let’s dive into the nitty-gritty of keeping your tanks fresh and odor-free.
The Culprits Behind the Stink
First things first, let’s identify the villains causing the funk in your RV. Your holding tanks come in two flavors: black and grey. The black tank handles sewage, while the grey tank deals with shower and sink water. The black tank is usually the troublemaker, emitting the worst odors. Here’s what might be causing the stench:
- Tank Fullness: It sounds obvious, but sometimes life on the road gets so hectic that we forget how full our holding tank is. When it’s brimming, strange smells can infiltrate your cozy home on wheels.
- Blocked Tank Vent: Picture this: a pipe sticking out of your tank and (usually) out of your roof. That’s your tank vent. If leaves, pinecones, or any other outdoor invader blocks it, the odor has nowhere to escape except inside your camper.
- Leaky Toilet Seals: Sometimes the odor isn’t from your holding tank itself but from fluids leaking from your RV toilet.
- Holding Tank Buildup: If you’ve neglected tank cleaning, nasty buildup could be the culprit.
- Toilet Paper Troubles: Using anything other than septic-safe toilet paper creates a turd-block in your tank. Yes, you read that right. And that blockage leads to some serious stink.

The Odor-Busting Action Plan
Now that we’ve unmasked the odor villains, let’s kick them to the curb:
- Empty and Clean: Start by ensuring your tank is empty. Dump it, rinse it, and throw in some tank treatment with fresh water.
- Ventilation Matters: Make sure your holding tank system has adequate airflow. Aerobic bacteria (the good guys) need oxygen to thrive. So, keep those vents clear.
- Choose the Right Products: Avoid using regular detergents, bleach, or odor-masking agents in your holding tank. Stick to septic-safe treatments.
- The Geo Method: Dump your black and grey tanks, close the valves, dissolve powdered water softener in water, and add laundry detergent. Voilà! A natural tank-cleaning cocktail.
- Regular Maintenance: Flush your tank with fresh water every few pump-outs. Lubricate the head, use quick-dissolve toilet paper, and add recommended tank treatments.
Ah, the joys of RV life! The open road, the starry nights, and… oh no, is that water pooling around your tank? Fear not, fellow road warrior! Let’s dive into the world of common tank repairs.

The Sneaky Leak Culprits
So, you’ve got a leak. It’s like your tank decided to play hide-and-seek with water. But where’s it coming from? Let’s unmask the culprits:
- The Drain Valve Dance: Sometimes, the drain valve gets a little leaky. It’s like it’s whispering, “Hey, I’m tired of holding it all in!” Check that little guy. Tighten it up or replace it if needed. You’ll find replacement parts online at places like MY-IVVI eparts. They’ve got everything from water heater repair parts to unicorn-shaped gaskets (okay, maybe not unicorns, but close).
- Pressure Relief Valve Drama: The pressure relief valve might be feeling overwhelmed. It’s like the tank’s therapist, releasing excess pressure. If it’s dripping, replace it. No need for therapy bills here!
- Pipe Connection Tango: Those threaded connections between pipes can get loose. Imagine them doing a little dance, water slipping through the gaps. Tighten ’em up, and they’ll waltz happily ever after.

The Inner Tank Quest
Now, let’s venture inside the tank. It’s like spelunking, but with fewer bats and more rust. Here’s what to look for:
- Rust Spots: If your inner tank has more rust than a pirate’s treasure chest, it’s time for a switcheroo. Rust weakens the tank, and nobody wants a soggy adventure.
- Wet Insulation Surprise: Peek under the tank’s cozy insulation blanket. Is it damp? Wet insulation is like a soggy hug – not fun. Replace it and keep your tank snug and dry.
Seal the Deal (Literally)
Seals are like the tank’s secret agents. They keep things tight and cozy. Here’s how to seal the deal:
- Flapper Fix: If your toilet tank is leaking, blame it on the flapper. It’s like the tank’s rebellious teenager. Replace it, and your toilet will stop playing hide-and-seek with water.
- Gasket Giggles: Gaskets – those rubbery wonders – can get worn out. They’re like the tank’s favorite socks. Swap ’em out, apply a thin layer of silicone sealant, and voilà! No more leaks.
- Bolt Ballet: Bolts hold the tank together. If they’re loose, it’s like the tank’s doing the cha-cha. Tighten ’em up, and your tank will stay put.

Upgrading to Tank Sensors – Modern Solutions for Accurate Tank Level Monitoring
Ah, the mysterious world of RV tank levels! It’s like deciphering hieroglyphics while riding a unicycle – challenging but oddly thrilling. But fear not, fellow road warriors! Let’s dive into the future of tank level monitoring with some snazzy upgrades.
Ultrasonic Sensors – The Cool Kids on the Block
Picture this: ultrasonic sensors are like the James Bond of tank monitoring. They’re sleek, non-contact, and oh-so-accurate. Here’s why they’re all the rage:
- Accuracy, Baby!: Ultrasonic sensors use sound waves to measure the liquid level. No more guessing games – these babies give you precise data. Say goodbye to those “Is it half full or half empty?” debates.
- No Touchy-Feely: Unlike float sensors (those clingy exes), ultrasonic sensors don’t need to touch the liquid. They hover above, like guardian angels watching over your tank. No contamination, no drama.
- Flexibility Galore: Tank shape? Size? Ultrasonic sensors don’t discriminate. They work with cylindrical, rectangular, or even amoeba-shaped tanks (okay, maybe not amoebas, but you get the idea).
- Real-Time Magic: Ultrasonic sensors provide real-time data. It’s like having a live feed of your tank’s inner secrets. “Hey, tank, what’s up? Still full of water? Cool.”

Hydrostatic Sensors – The Old Reliables
Think of hydrostatic sensors as the wise grandpas of tank monitoring. They’ve been around, seen it all, and still deliver the goods. Here’s why they’re classic:
- Pressure Wizards: Hydrostatic sensors gauge the fluid column’s hydrostatic pressure. Fancy words, right? Basically, they’re like tank whisperers, sensing the liquid’s weight. No hocus-pocus, just physics.
- Bottom Dwellers: These sensors hang out at the tank’s bottom, submerged in the liquid. They’re like the introverts of the sensor world – quietly doing their job without making a fuss.
- Affordable Awesomeness: A tried-and-true method for precise tank data. No frills, no drama – just reliable readings. And they won’t break the bank. Cha-ching!

Making the Switch
So, how do you upgrade? It’s easier than teaching a cat to juggle. Here’s the lowdown:
- Assess Your Tank: Peek at your tank. Is it square, round, or shaped like a UFO? Choose your sensor accordingly. Ultrasonic for the cool kids, hydrostatic for the classics.
- Installation Tango: Mount your sensor – whether it’s floating above or chilling at the bottom. Connect the wires (pretend it’s a puzzle). Voilà! You’re practically a tank sensor pro.
- Data Delight: Now watch the magic happen. Your dashboard (or phone app) will light up with tank levels. It’s like a high-tech crystal ball, minus the fortune-telling.
Remember, fellow nomads, accurate tank monitoring is the key to stress-free adventures. So, grab your sensors, channel your inner tech pro, and upgrade those tanks. Happy trails!

