Owning an RV is all about embracing freedom and adventure. But like any vehicle, your RV requires regular maintenance to keep it in top shape. One of the most crucial aspects of RV maintenance is taking care of the roof. A damaged roof can lead to leaks, mold, and other issues that can ruin your trips and be costly to repair. In this blog post, I’ll share my personal experience with RV roof repair, offer some valuable tips, and provide a step-by-step guide to help you tackle this task on your own.
Why Roof Maintenance is Important
Before diving into the how-to, let’s discuss why maintaining your RV roof is so important. The roof of your RV is exposed to the elements 24/7. Sun, rain, snow, and wind can all take a toll on its integrity. Over time, even minor damage can lead to significant problems like water leaks, which can cause interior damage, mold growth, and structural issues.

Materials and Tools You’ll Need
Here’s a list of essential materials and tools you’ll need for RV roof repair:
Materials
- RV Roof Sealant: Specifically designed for RV roofs, it helps seal cracks and seams.
- RV Roof Patch Tape: Ideal for larger repairs and patching holes.
- RV Roof Coating: A protective layer to apply after repairs to extend the life of your roof.

Tools
- Ladder: Ensure it’s stable and tall enough to reach your roof comfortably.
- Cleaning Supplies: Mild detergent, water, scrub brush, and a bucket.
- Putty Knife: For applying sealant and removing old material.
- Utility Knife: Useful for cutting patch tape and other materials.
- Caulking Gun: For applying roof sealant.
- Protective Gloves: To keep your hands safe during the repair process.
- Brush or Roller: For applying roof coating.
General Rules for RV Roof Repair
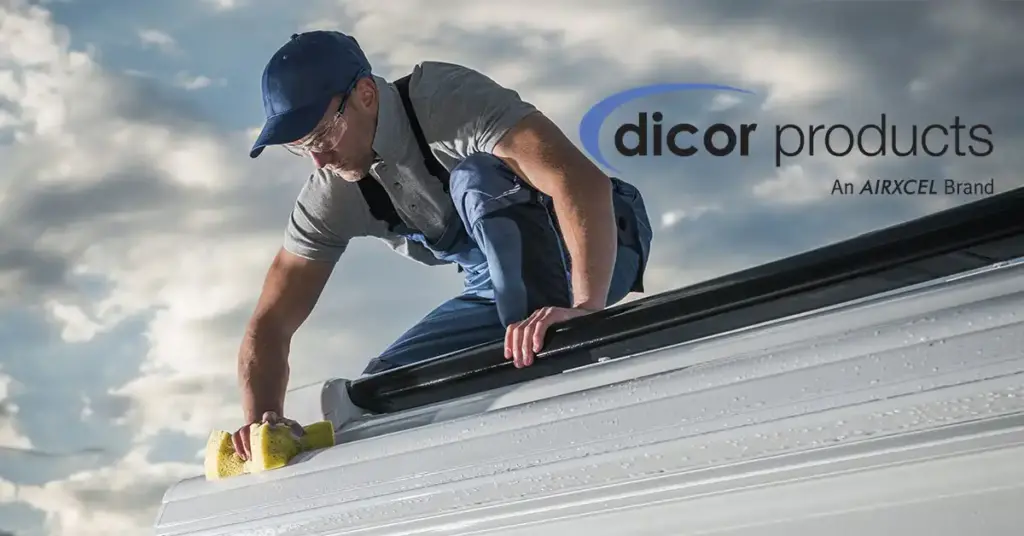
- Safety First: Always prioritize safety. Use a stable ladder, wear non-slip shoes, and consider having someone nearby to assist if needed.
- Regular Inspections: Perform regular inspections, ideally every three months, to catch small issues before they become big problems.
- Clean Thoroughly: Before making any repairs, ensure the roof is clean. Dirt and debris can prevent materials from adhering properly.
- Weather Considerations: Choose a dry, sunny day for repairs to ensure the materials set properly and avoid moisture trapping.
Step-by-Step Guide to Repairing Your RV Roof
Step 1: Inspection
Start by thoroughly inspecting your RV roof. Look for cracks, holes, worn sealant, and any signs of water damage. Pay special attention to seams, vents, and edges where damage is most likely to occur.
Step 2: Clean the Roof
Once you’ve identified the areas that need repair, clean the roof thoroughly. Use a mild detergent and water to scrub away dirt, grime, and old sealant. Allow the roof to dry completely before proceeding.
Step 3: Remove Old Sealant and Damaged Areas
Use a putty knife to remove old sealant around the damaged area. If you’re dealing with a hole or significant crack, cut away any damaged material with a utility knife. Be careful not to cut too deep and damage the underlying roof structure.
Step 4: Apply Roof Sealant
For small cracks and minor damage, apply RV roof sealant. Use a caulking gun to apply a generous amount of sealant to the affected area. Smooth it out with a putty knife, ensuring it’s evenly distributed and covers the entire crack.
Step 5: Patch Larger Holes
For larger holes or tears, use RV roof patch tape. Cut a piece of tape slightly larger than the damaged area. Apply the tape over the hole, pressing down firmly to ensure a good seal. Use a putty knife to smooth out any bubbles or wrinkles.
Step 6: Apply Roof Coating
Once all repairs are made, apply an RV roof coating. This protective layer helps extend the life of your roof and prevents future damage. Use a brush or roller to apply the coating evenly across the entire roof surface. Allow it to dry as per the manufacturer’s instructions.
Step 7: Final Inspection
After the roof coating has dried, perform a final inspection. Ensure all repairs are secure, and there are no missed spots. This step helps confirm that your roof is ready for the next adventure.
Tips for a Successful DIY RV Roof Repair
- Choose the Right Products: Not all sealants, tapes, and coatings are created equal. Ensure you choose products specifically designed for RV roofs to guarantee compatibility and durability.
- Be Thorough: Don’t rush the repair process. Take your time to ensure all damaged areas are properly fixed and sealed.
- Perform Regular Maintenance: Regularly check your roof and perform minor touch-ups as needed. This proactive approach can save you time and money in the long run.
- Seek Professional Help if Needed: If you’re unsure about any step of the repair process or if the damage is extensive, don’t hesitate to seek professional help. It’s better to invest in expert assistance than to risk further damage.

Conclusion
Repairing your RV roof might seem daunting, but with the right materials, tools, and a little patience, it’s a manageable DIY task. Regular maintenance and prompt repairs can keep your RV in top shape, ensuring many more adventures on the road. Remember, the key to a long-lasting RV roof is consistent care and attention to detail.
So, roll up your sleeves, grab your tools, and give your RV the care it deserves. Happy travels and safe adventures!
Feel free to visit our website eParts for more tips and high-quality materials for all your RV maintenance needs.