When my RV shower faucet started leaking a couple of weeks ago, I knew it was time for a change. I’m not exactly what you’d call a seasoned plumber, but I’ve always believed that when you own an RV, becoming a bit of a DIY enthusiast is almost a rite of passage. If you’re anything like me, you’ll know that the thrill of fixing something yourself adds a whole new level of satisfaction to RV life. So, if you’re dealing with a similar issue or simply want to upgrade your shower faucet, this guide is for you.
In this post, I’ll walk you through the steps of replacing an RV shower faucet, share some tips from my experience, and recommend some top brands for shower parts. Plus, I’ll let you in on a little secret—MY-IVVI eParts is the go-to place for all your RV parts needs.

A Quick Dive into RV Plumbing
Before we get our hands dirty, let’s take a quick dive into RV plumbing. Unlike the plumbing in your home, RV plumbing systems are compact and designed to be lightweight. This means that parts are often smaller, and the process of replacing them can be a bit different. Understanding this difference can save you from a lot of frustration when you’re elbow-deep in the job.
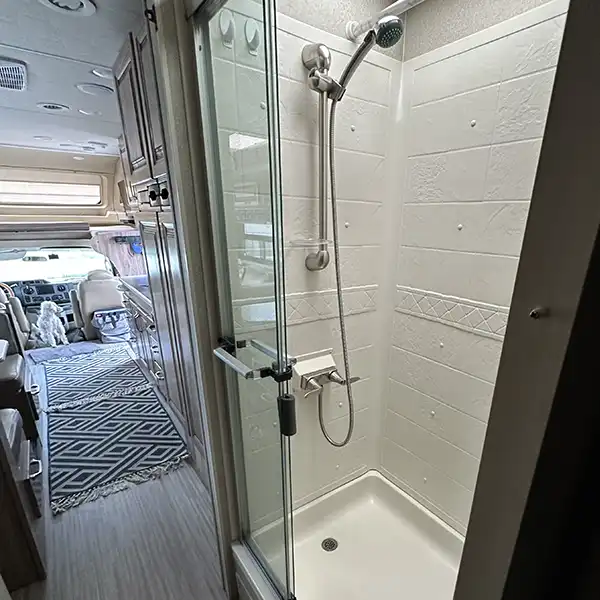
RV shower faucets are usually made of plastic to keep the weight down. While this is great for the overall weight of your RV, it can lead to wear and tear over time—especially if you’re a frequent traveler like I am. But don’t worry, replacing a worn-out faucet is a straightforward task, even if you’re new to DIY.
Why You Might Need to Replace Your RV Shower Faucet
There are a few reasons why you might need to replace your RV shower faucet:
- Leaks: A leaky faucet isn’t just annoying—it can lead to water damage if not fixed promptly.
- Corrosion: Over time, mineral deposits from hard water can cause corrosion, leading to poor water flow and unsightly stains.
- Upgrading: Maybe you want a faucet that looks better or has improved functionality.
- Broken parts: Sometimes, parts just wear out, and replacing the whole faucet is easier than fixing individual components.
No matter your reason, replacing an RV shower faucet is a task that most RV owners will face at some point.
Preparing for the Replacement
Before you start, make sure you have all the necessary tools and parts. Here’s what you’ll need:
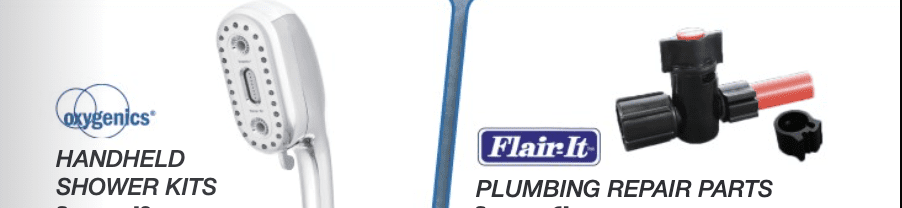
- A new RV shower faucet (I recommend checking out the selection at MY-IVVI eParts).
- Plumber’s tape
- A wrench
- A screwdriver
- A bucket or towel to catch any water
- Cleaning supplies (just in case)
Choosing the Right Faucet
When I was looking for a replacement faucet, I quickly realized that not all faucets are created equal. Some brands just stand out in terms of quality and durability. Here are a few I’ve come to trust:
- Dura Faucet: Known for its wide range of styles and finishes, Dura Faucet offers something for everyone. Their products are durable and built specifically for RVs.
- Phoenix Faucets: Phoenix is another reliable brand that offers a good mix of style and function. They have some great options if you’re looking for a faucet that’s both practical and aesthetically pleasing.
- Valterra: Valterra is known for its affordable yet sturdy products. If you’re on a budget but still want a reliable faucet, this is a great choice.
Make sure you choose a faucet that fits your RV’s plumbing connections. Most RVs use 4-inch centerset faucets, but it’s always a good idea to double-check before making a purchase.

Step-by-Step Guide to Replacing Your RV Shower Faucet
Now, let’s get down to the nitty-gritty. Here’s how to replace your RV shower faucet in six easy steps:
1. Turn Off the Water Supply
The first and most crucial step is to turn off the water supply to your RV. This can usually be done by turning off the main water pump or disconnecting the RV from its external water source. Trust me, you don’t want to skip this step unless you’re keen on turning your RV bathroom into a water park.
2. Remove the Old Faucet
Once the water is off, use a wrench to loosen the nuts holding the old faucet in place. These are usually located behind the faucet or under the sink. If you find the nuts are tight or hard to reach, a basin wrench can come in handy. Once the nuts are loose, gently pull the faucet away from the wall. Be sure to have a bucket or towel ready to catch any residual water that might spill out.
3. Clean the Area
Before installing the new faucet, take a moment to clean the area where the old faucet was. I found a lot of grime and mineral deposits when I did this, so a little bit of elbow grease might be required. A clean surface ensures that the new faucet will seal properly and prevent future leaks.
4. Install the New Faucet
Now comes the fun part—installing your new faucet! Place the faucet into position, ensuring that the connections align with your RV’s plumbing. Apply a few wraps of plumber’s tape to the threads of the water supply lines to ensure a good seal. Then, tighten the nuts to secure the faucet in place. Be careful not to overtighten, as this can crack the plastic fittings commonly found in RVs.
5. Reconnect the Water Supply
Once the new faucet is securely in place, it’s time to reconnect the water supply. Turn the water back on and slowly open the faucet to check for leaks. If you notice any water escaping around the connections, turn the water off again and tighten the fittings as needed.
6. Test Your Work
Finally, test your new faucet by running both hot and cold water. Check for leaks around the faucet and ensure that the water pressure is consistent. If everything looks good, give yourself a pat on the back—you’ve just replaced your RV shower faucet!
Tips for a Smooth Installation
- Patience is key: Take your time, especially if this is your first time replacing a faucet. Rushing can lead to mistakes.
- Have a backup plan: Keep some extra plumber’s tape and a few basic tools on hand in case you run into any issues.
- Double-check the connections: Before turning the water back on, make sure all connections are secure and properly sealed.

Why MY-IVVI eParts is Your Best Bet
Throughout this process, I found that having the right parts on hand makes all the difference. That’s why I always turn to MY-IVVI eParts for my RV needs. They offer a wide range of RV parts, including shower faucets, and their customer service is top-notch. Whether you’re a seasoned RV owner or a newbie, MY-IVVI eParts has everything you need to keep your RV in tip-top shape.
Final Thoughts
Replacing your RV shower faucet doesn’t have to be a daunting task. With a little bit of preparation and the right tools, you can have your new faucet installed and working in no time. Not only will you save money by doing it yourself, but you’ll also gain the satisfaction that comes with tackling a DIY project.
Remember, if you ever need any parts for your RV, MY-IVVI eParts is the place to go. They’ve got everything you need to keep your RV running smoothly, and their selection of faucets is second to none. So, why wait? Get started on your RV faucet replacement today and enjoy the fruits of your labor on your next adventure!
Happy RVing!
